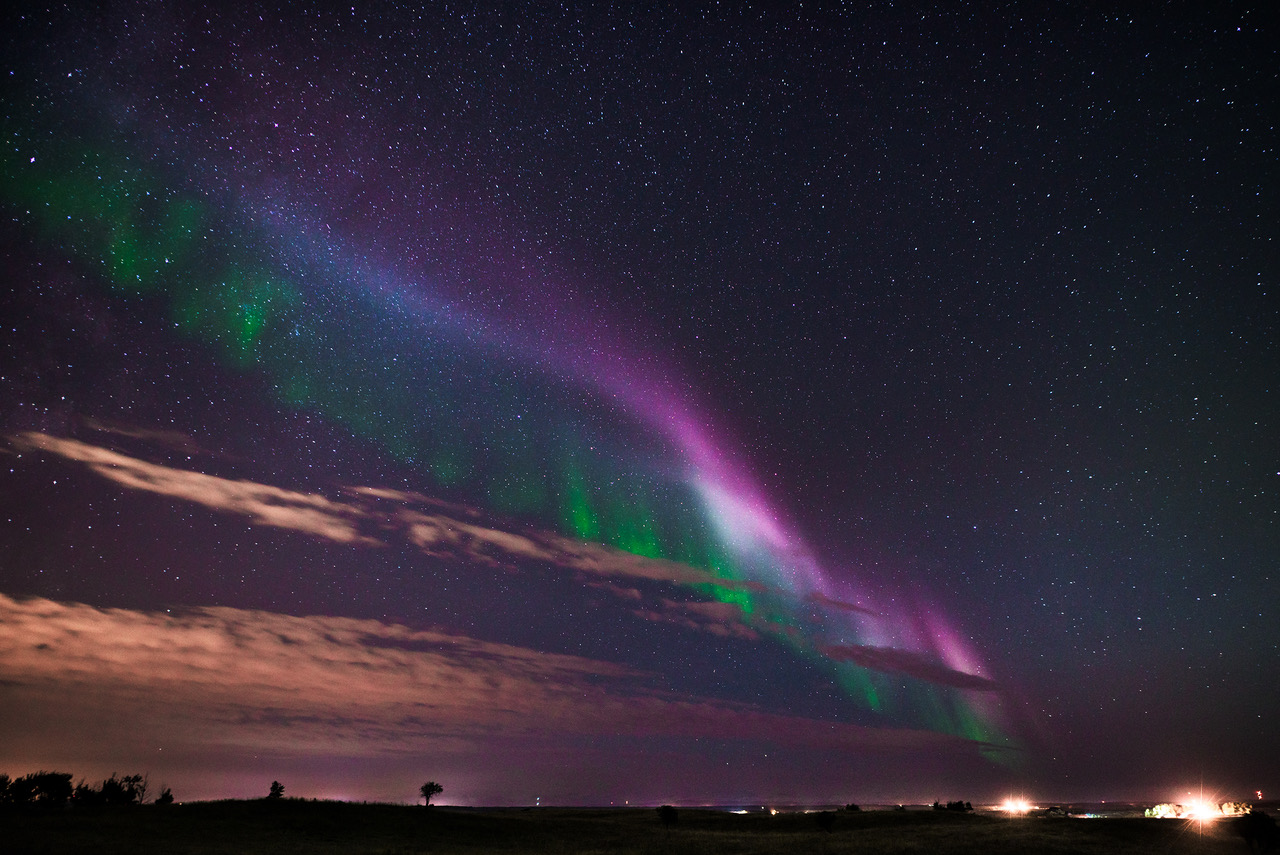
Photographer Steven Spence chased the aurora borealis, or Northern Lights in Iceland and got some fantastic photos. Find out how he did it.
For night’s swift dragons cut the clouds full fast,
And yonder shines Aurora’s harbinger;
At whose approach, ghosts, wandering here and there,
Troop home to churchyards.
— Shakespeare, A Midsummer Night’s Dream
Curtains of Light Across the Sky
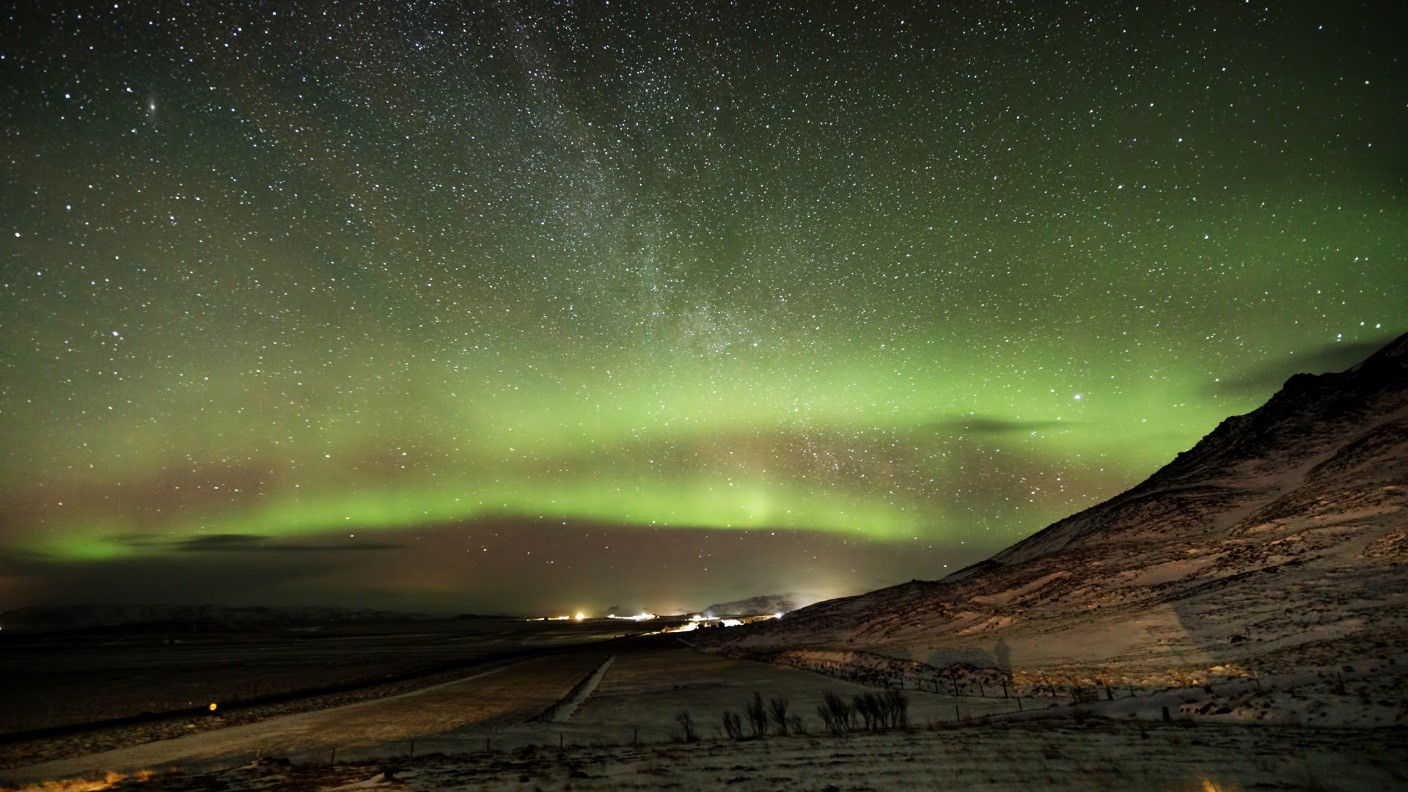
Seeing the northern lights (aurora borealis) has long been on my bucket list. In March 2018 I was fortunate enough to have a break, allowing me to travel solo for some weeks. I headed to Iceland (also on my bucket list), hoping to catch not only the northern lights but also come away with a decent photo or two. In this series of articles, I will share with you both my experience and some science behind the northern lights.
Hunting the Northern Lights in Iceland
Looking for the northern lights in any country is a gamble. You may travel there and not see the northern lights at all in the time you have, so plan for other activities too.
Here are some conditions you need to have a successful experience. First, you need good weather with at least partially clear skies. There needs to be enough solar activity to trigger the northern lights, and the more activity, the brighter and further south the northern lights will be visible. It helps if you pick the right time of year, get in the band where auroral displays generally occur and give yourself enough days to wait out bad weather. Finally, you also need some patience to watch the skies, because the northern lights might appear at 9 PM or 2 AM. It can be difficult to keep an eye on the skies during the night, especially in freezing conditions like I experienced in Iceland. Fortunately, there are apps and websites like the Aurorasaurus, which will help you with alerts about when there is a higher probability of seeing the northern lights in your location.
Regardless of when you visit Iceland, I highly recommend visiting the Aurora Reykjavik: The Northern Lights Center. It has excellent displays explaining the northern lights as well as beautiful films. The staff are multilingual and can provide helpful tips on where, when, and how to photograph the aurora displays.
The Best Time of Year
The mechanisms behind the formation of the northern lights occur throughout the year, but most of the displays they produce are faint. The lights are washed out by the bright sky during daytime and thus invisible to our eyes. Auroral displays can be seen best from an hour or two after sunset to an hour or two before sunrise. The longer the night, the more opportunities an observer will have to see the northern lights. Therefore, the best period is between the autumnal equinox (September) and the spring equinox (March), with the peak being around the winter solstice (December).
The Best Locations in the World
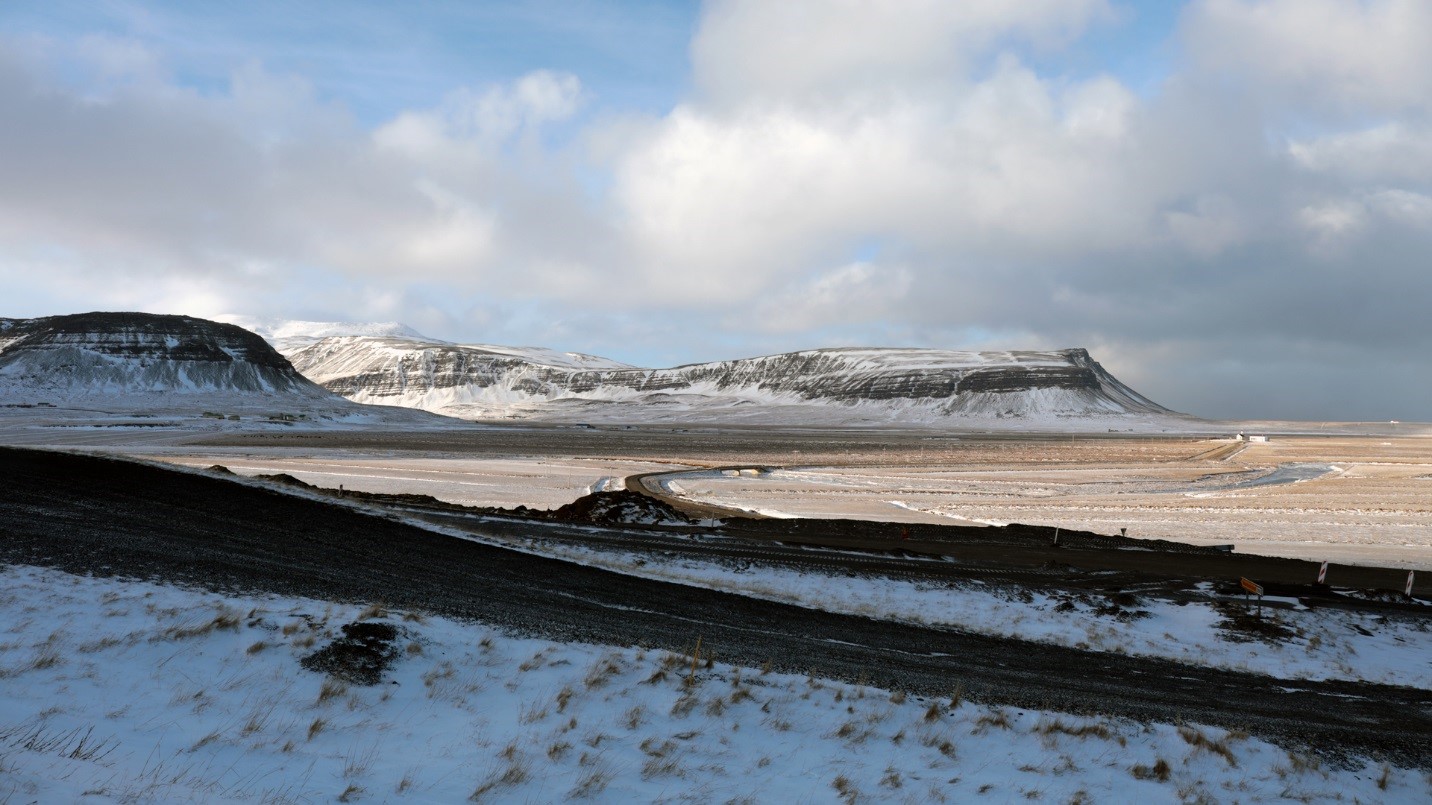
The northern and southern lights generally display in an oval region around the magnetic north or south poles. For our readers in North America or Western Europe, the best locations along the northern oval are Alaska, Canada, Greenland, Iceland, Norway, Sweden, and Finland. There are vast stretches of Russia in the typical display area, but for less challenging logistics, I recommend the Nordic countries given their excellent English-language skills and established northern lights tourism. I recommend Iceland over Greenland for most tourists for Iceland’s excellent air connections and infrastructure. For the adventurous, however, Greenland can provide spectacular auroral displays and a unique travel experience.
RELATED: PHOTOGRAPHING SNOWFLAKES: SKY CRYSTALS
Get Away from Light Pollution
While auroral displays can be bright enough to be seen even from a city like Reykjavik (Iceland) or Tromsø (Norway), they are much better when you get outside the city lights. Dark skies make a real difference in how well the human eye can pick up the northern lights.
Looking at the Right Time of Night
Holding all-night vigils waiting for the northern lights to appear can be frustrating and wear you out quickly night after night. Two important tips to help you make the best use of your time are checking the weather forecast and checking the aurora forecast.
While photographing the Northern Lights in Iceland, I used and highly recommend Vedur.is for forecasts of weather conditions. There is little point in staying up if thick clouds will blanket the sky overnight, but if you know the skies will clear at 2 AM, then you may set an alarm to check for the northern lights.
RELATED: Take These Virtual Science Tours: Labs
Aurora Forecasts
For forecasts specific to the northern lights, I use the Aurorasaurus (website) app on my smartphone. Aurorasaurus is a project led by Dr. Elizabeth MacDonald (NASA) and supported by the U.S. National Science Foundation, the New Mexico Consortium, NASA, Penn State University, and Science Education Solutions. Aurorasaurus provides excellent location-based alerts reflecting the probability of seeing the northern lights at a specific time. The app was extremely helpful to me while balancing my sleep requirements between night-time northern light hunting and daytime sightseeing. Aurorasaurus is exciting for citizen scientists too: users can report their northern light sightings and get points for their contributions. Aurorasaurus citizen science reports have helped make scientific discoveries: STEVE (Strong Thermal Emission Velocity Enhancement). [1]
See the Northern Lights in Iceland
If you want to watch the northern lights with your eyes or binoculars, then generally all you need is an open space with clear, dark skies. What you will see with your eyes will look different from the photos shared on the internet. This is because the eye does not accumulate the light over a long period of time like a camera does. The human eye’s sensitivity to colors is also different from what the camera picks up electronically or on film. My eyes saw a fainter, paler (less saturated) version of the northern lights than I captured with my camera.
Photographing the Northern Lights
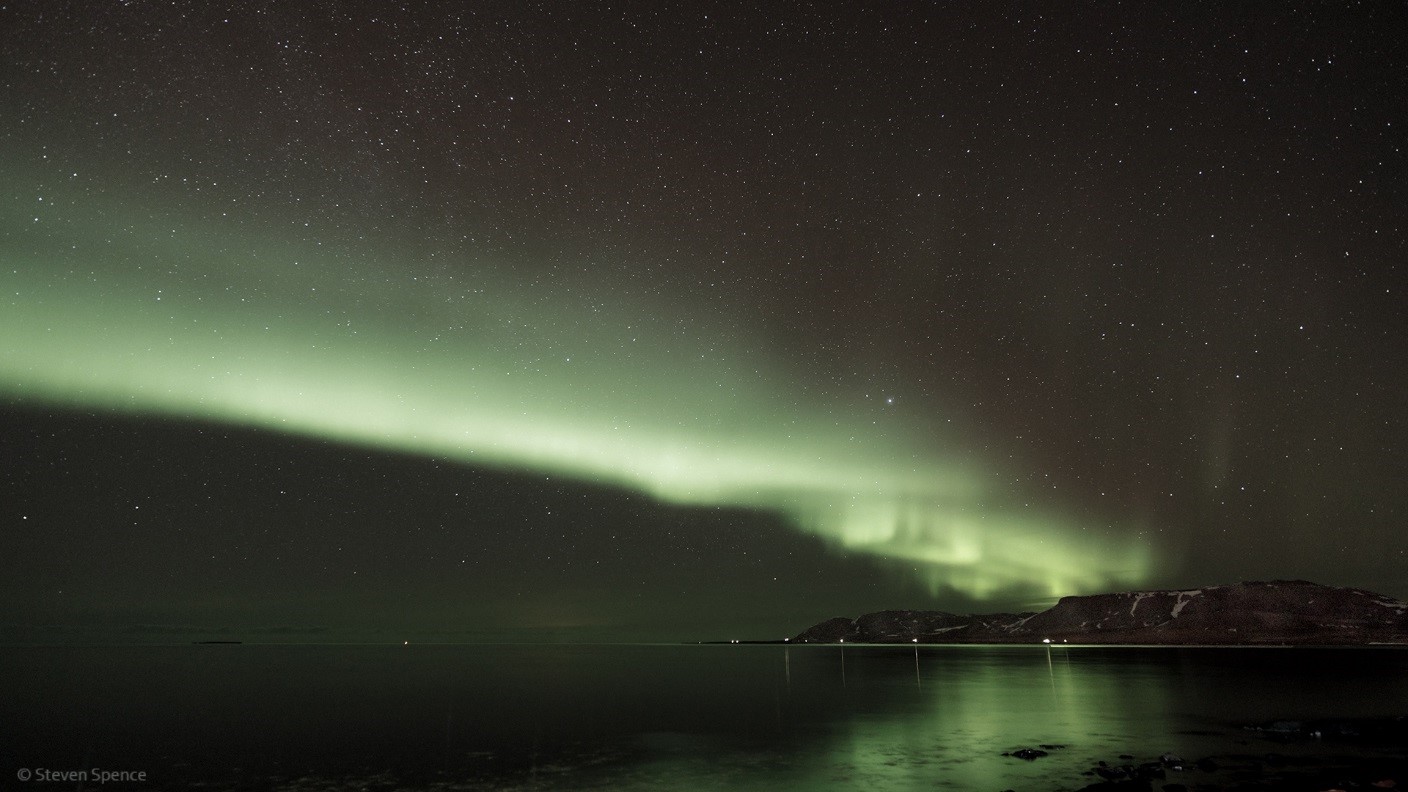
Taking photos with either a smartphone or a camera requires a long exposure (2–15 seconds) and the use of a tripod. Set the focus manually to infinity. Use a “fast” f-stop like f1.4, f2 or f2.8 if possible. (The lower the number, the more light your camera gets through the lens). You may also want to set the ISO (light sensitivity) manually, anywhere from 400 to 6400 depending on your camera and how bright the northern lights are. To determine the best setting, I recommend taking three photos at ISO 1600 with different lengths—5 seconds, 10 seconds, and 15 seconds—to see which gives the best results. If they are all too dark, then change to a more sensitive ISO number like 2500 or 3200 and try another three test photos. If the results are all too bright, then you may want to do three more test photos with a less sensitive ISO setting, like 800. Once you get a series where one or two of the photos look better than the rest, you should try to get closer to the optimal exposure.
Let’s assume that our first series of photos at ISO 1600 had decent results at 5 seconds and 10 seconds, but the 15-second exposure was too bright and lost detail. We can find the optimal exposure by trying another series of photos from 6 seconds to 9 seconds. Pick the one that produces the best results. Stick with those settings (e.g., f2.8, ISO 1600, 8 seconds) while you continue getting good results. The northern lights may increase or decrease in brightness as the display continues, therefore you may need to adjust your settings again. If the northern lights get brighter, then bringing your exposure down to 5 seconds may yield good results. If the northern lights dim, then increasing the exposure time from 8 seconds to 10, 12, or even 15 seconds may be necessary.
Processing the Photos
Processing your photos in software can be tricky. The shots straight out of the camera often will be dim or have different colors from what you remembered. That can also be because the JPEG image produced has been processed by the camera already. If you have a camera allowing you to shoot in RAW format, it will contain all the information recorded, allowing you to do your own processing in software. Sometimes the JPEG image may be a look you like and decide to keep. Other times it may bother you. The color temperature of light sources in your area may affect the white balance the camera selects for the photo. This can easily be adjusted when post-processing RAW files using typical photo-editing software.
Be sure to read The Science Behind Auroras, in which I explain the science of what causes the Northern Lights, and check out this roundup of aurora articles and photos!
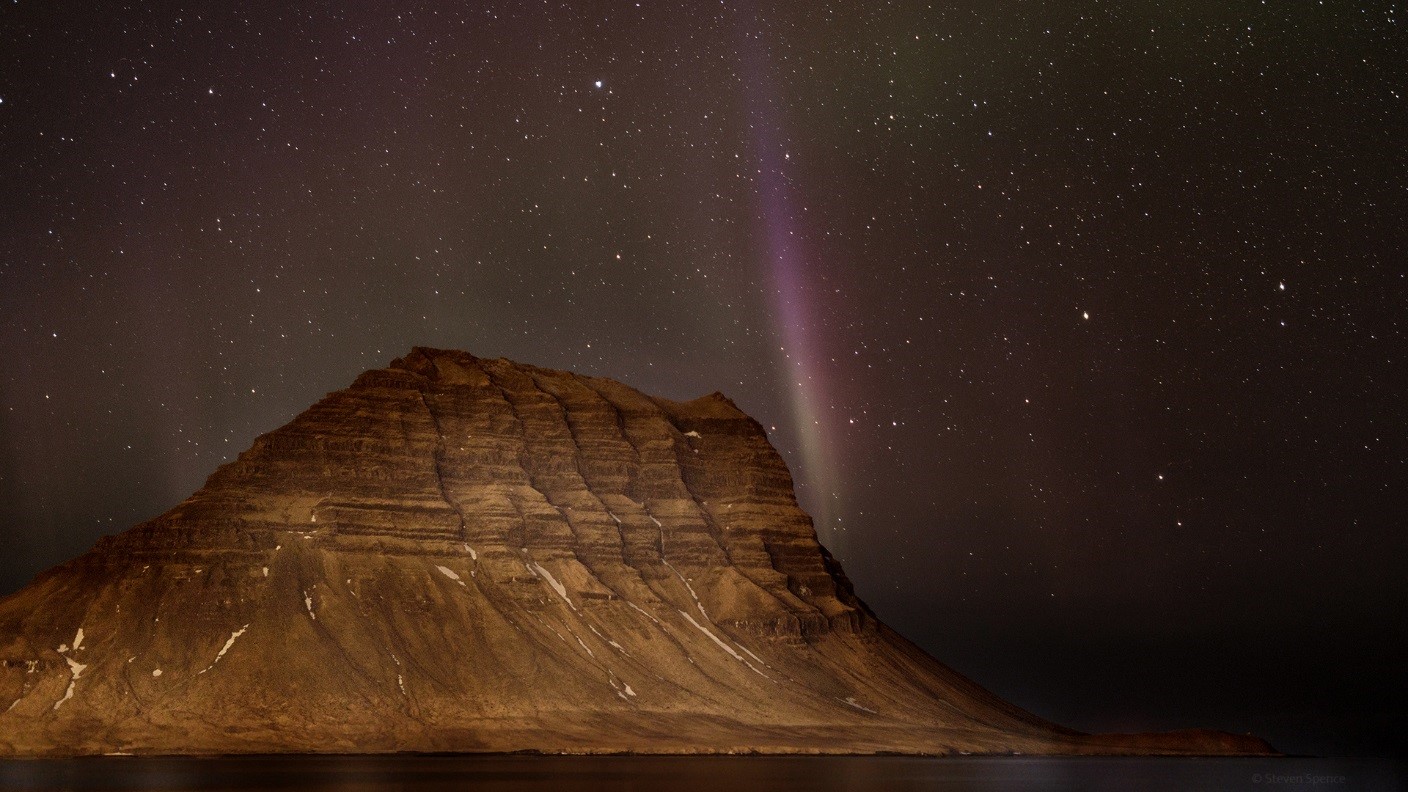
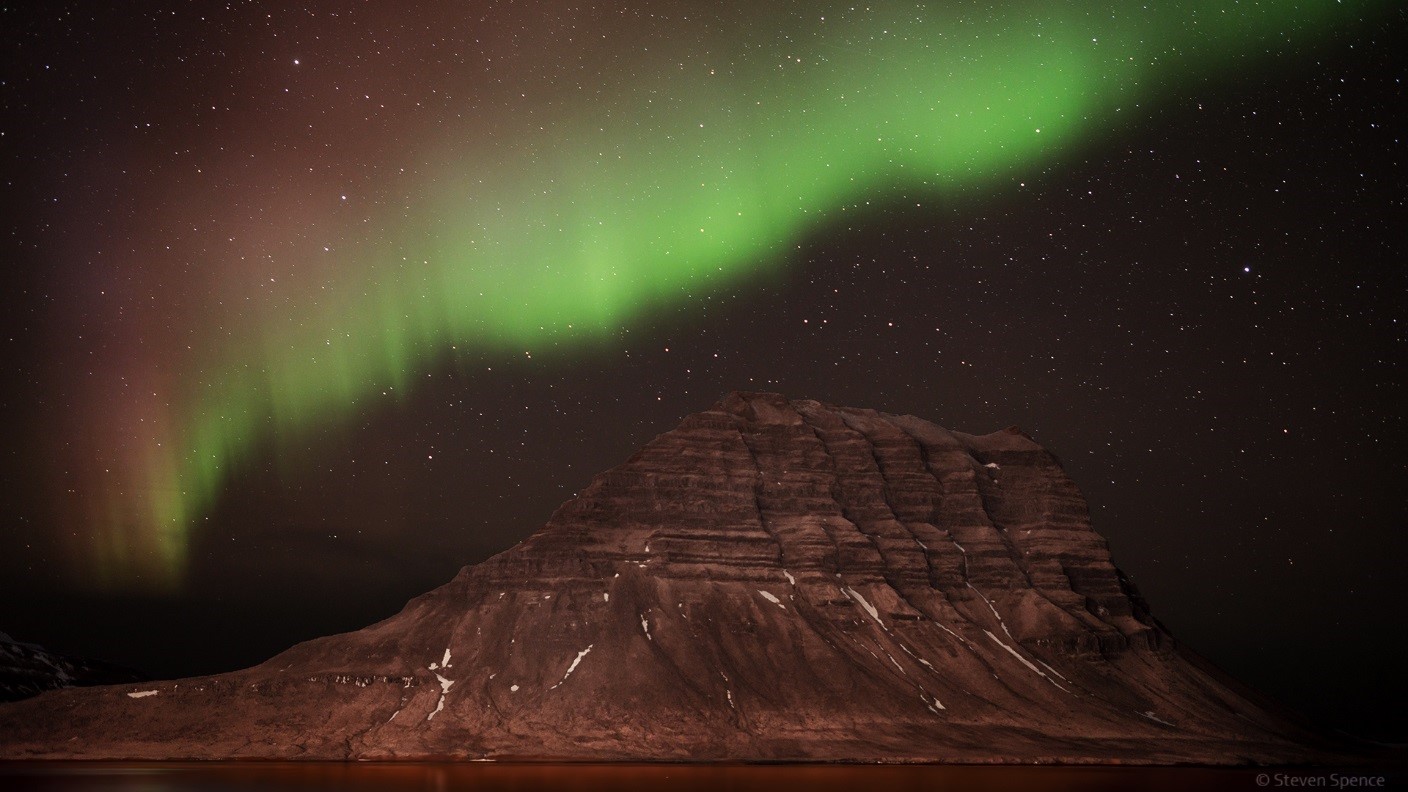
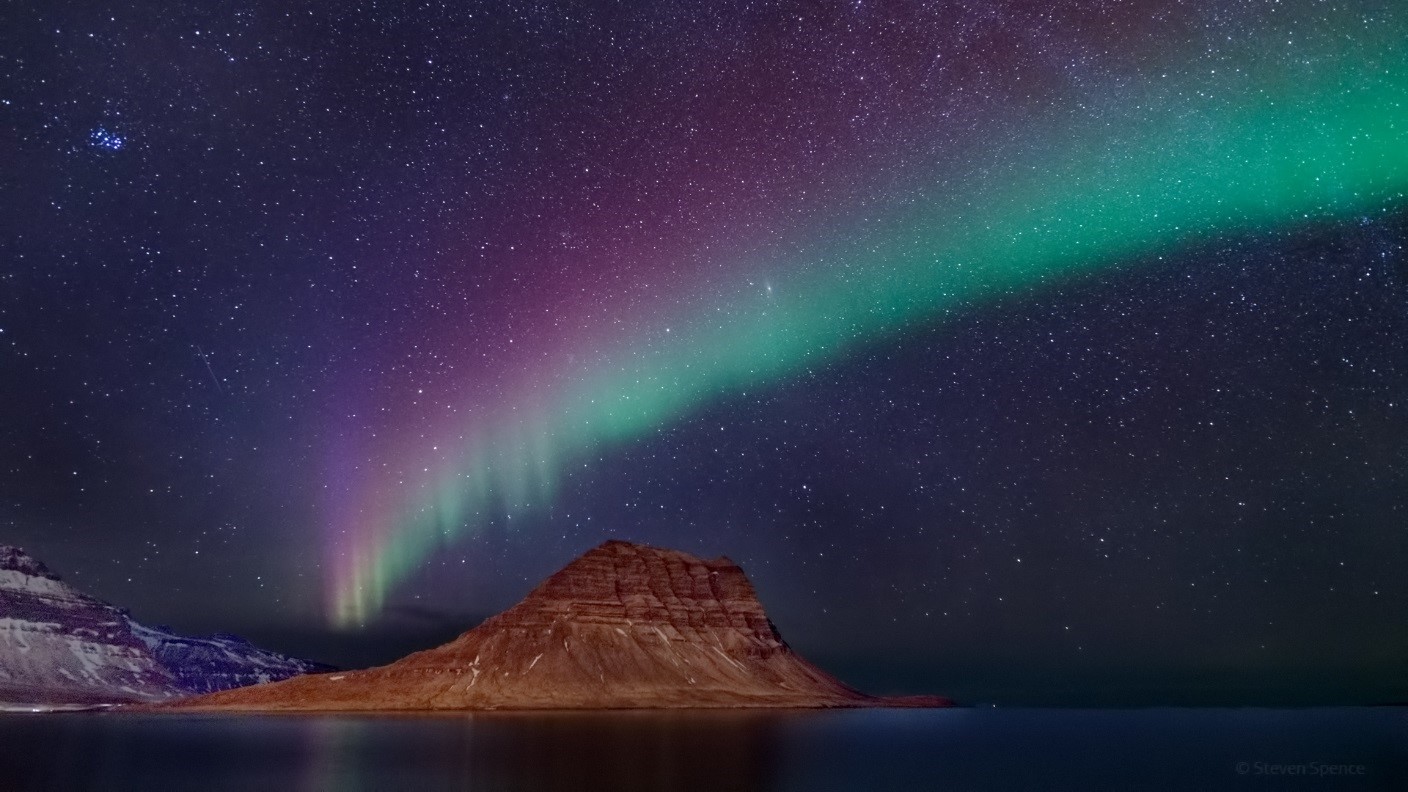
Feature image: Panorama composed of two exposures. Location: Grundarfjörđur Harbor, Iceland. On the left is the famous Kirkjufell Mountain. Photo settings: F2.8, ISO-2000, 15 sec, 18mm.
Reference
[1] MacDonald, E. A., et al. (2018, March 14)). New science in plain sight: Citizen scientists lead to the discovery of optical structure in the upper atmosphere. Science Advances, 4(3), eaaq0030. Available at http://advances.sciencemag.org/content/4/3/eaaq0030.
More about the Beautiful Northern Lights
All about the Aurora – A roundup of articles all about the amazing Aurora Borealis, or Northern Lights. Find out what causes them and where to see them.
Debunking the aurora myth: What causes an aurora? – Why do we see aurora at night? Considering only the solar wind is not enough to understand auroras. We need to explore also other factors.
Citizen Scientists Help Solve “Aurora” Mystery – The Aurorasaurus team, led by Liz MacDonald, a space scientist at NASA’s Goddard Space Flight Center, learns about Steve, an aurora-like phenomenon.
The Science Behind the Aurora Borealis – The aurora borealis (the Northern Lights) is much more than pretty lights–it’s a perfect blend of solar wind and magnetic fields.
Aurora Borealis: Myths, Legends, Science – What causes the aurora borealis, or Northern Lights? Where can you see this amazing natural phenomenon? What did our ancestors think the aurora was?